Best 3D Printer Enclosure Heater (2026): Creality 400W PTC and DIY Options
Accessories
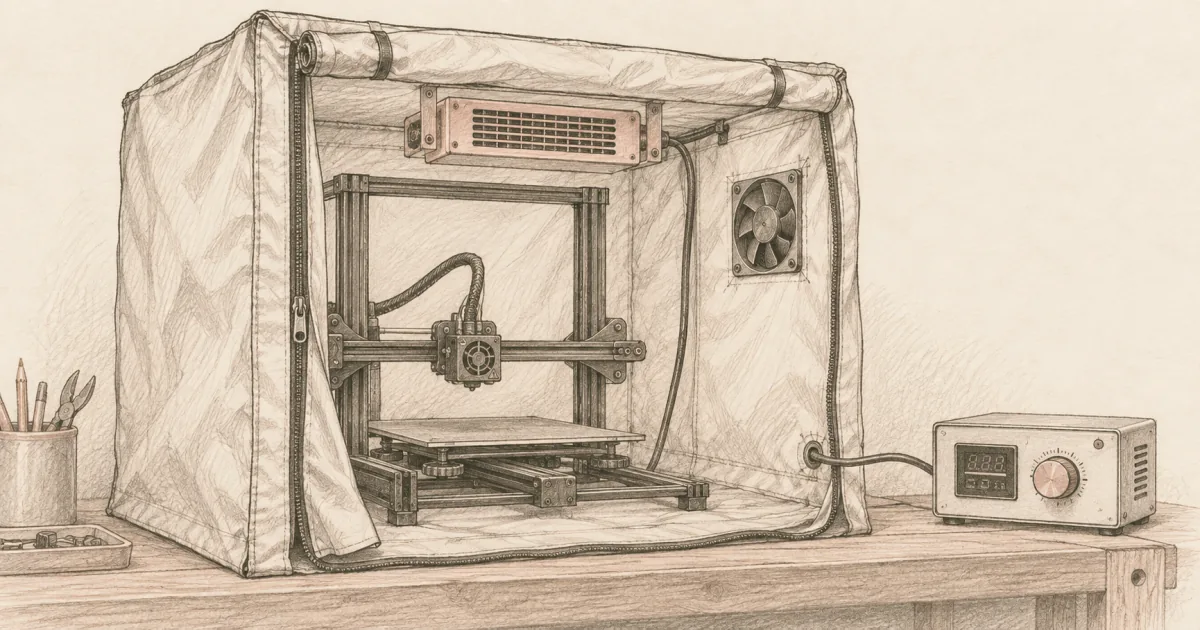
A tent holds heat; a heater keeps it warm. The Creality 400W PTC is the purpose-built pick. The PTCYIDU 200W ceramic fan heater is the DIY path with a thermostat. Both target ABS, ASA, and nylon prints.
Our picks
A tent holds heat. A chamber heater keeps the heat where the filament wants it. That distinction is what makes the difference between a print that comes off the bed flat and a part that splits between layers halfway through the job.
Most home ABS benches settle into a stable 50 to 60°C chamber when the right heater is paired with a tent. The hard part is choosing the heater that matches your tent, your printer, and the filament you actually run. The picks below cover the two paths that work on a real bench: a purpose-built kit with controller included, and a DIY build with a thermostat and a printed mount.
Start with our 3D printer enclosure guide if you have not picked the tent yet, and pair the heater with a vent kit from the best 3D printer enclosure fan page so fumes do not pool at bench height.
Why an enclosure alone is not enough for ABS
A fabric tent cuts drafts and holds some heat from the bed and hotend. That is enough for PETG corners that lift in a drafty room. It is not enough for ABS or nylon on a cold day.
ABS shrinks as it cools. If the outer layers of a print cool faster than the inner layers, the part stores stress and the corners lift off the bed. A heated chamber holds the print above the glass transition temperature of ABS (about 105°C) long enough for the layers to bond evenly. In practice that means 45 to 50°C for ABS, 50 to 60°C for ASA, and 55 to 65°C for nylon or polycarbonate.
A passive tent in a 22°C room might reach 35 to 40°C from the heated bed alone. That is enough for small PETG prints and not enough for ABS on a cold winter morning. The heater is what closes the gap.
Top pick: Creality 400W PTC Chamber Heater
The Creality 400W PTC Chamber Heater is the purpose-built enclosure heater for ABS, ASA, and nylon on open-frame Ender, Neptune, K1, and Bambu printers. The 400W PTC element heats up fast, the dual axial fans push warm air through the chamber, and the external controller carries the 45 to 70°C range with a 1 to 48 hour timer and power-off memory.
The dual safety shutoffs are what separate this kit from a DIY PTC element. If the fan fails, the heater stops. If the PTC element overheats, the heater stops. That is the bare minimum for unattended operation.
Install is the part most buyers underestimate. The kit needs a 4 to 5 inch hole cut into the tent wall, or a vent port already built into the tent. Measure twice and cut once; the metal bracket that ships in the box wants a clean hole.
Pick the Creality when you want a controller, dual fans, and dual safety shutoffs in one box, and you do not want to wire a thermostat yourself.
DIY budget: PTCYIDU 200W PTC ceramic fan heater
The PTCYIDU 110V 200W PTC fan heater is the DIY path to a heated enclosure on a tight budget. The PTC element is self-regulating and surface-insulated, which removes the runaway heater failure mode. The 200W rating is honest for small fabric tents in cold rooms.
The build needs three more parts: an STC-1000 or W1209 thermostat, a 12V circulation fan, and a printable mount. The thermostat cuts the heater when the chamber reaches target, so the cycle is automatic. Printable mounts for the PTCYIDU exist on Printables; bolt the heater to a 2020 aluminum rail, mount the fan beside it, and wire the thermostat in line.
Pick the PTCYIDU when you already have a thermostat, an aluminum extrusion to mount on, and the patience to wire a controller. Skip it if you want a turnkey kit with safety shutoffs built in.
Quick comparison
Match the heater to the tent
A small 80mm tent on a Creality Ender or Neptune frame wants 200 to 400W. A larger CoreXY enclosure with a heated chamber wants 400W plus, or a Klipper heater_generic build with a PID-tuned chamber thermistor. An oversized heater on a small tent cycles on and off without settling, which is rough on the PTC element over time.
If the tent fabric is fire-retardant Oxford cloth, the Creality kit and the PTCYIDU DIY build are both safe. If the tent is polycarbonate or acrylic, add a thermal fuse between the heater and the wall. Most fire-rated tents list the fabric and the maximum service temperature on the listing; respect both.
The vent route matters as much as the heater. A sealed enclosure concentrates ABS and ASA fumes, which are heavier than air and linger at bench height. Pair the heater with a vent fan and a carbon filter cartridge. Our best 3D printer enclosure fan guide covers the kit options; the 3D printer enclosure pillar covers the tent itself.
Safety that is not optional
A heated enclosure is an electrical heater in a fabric box. The minimum safety gear:
- Smoke detector in the room, ideally one mounted inside the enclosure
- GFCI-protected outlet for the heater power supply
- Thermal fuse on the heater element, in series with the mains wire
- Vent fan and carbon filter to handle ABS and ASA fumes
- Power supply and controller outside the heated air zone
PTC ceramic heaters are inherently safer than resistive heaters because the element drops power output as it heats up. That removes one failure mode. Pair the kit with a thermostat that cuts power on a fan failure, and a smoke detector that wakes you up if the rest fails.
Do not leave a first print unattended overnight until you know the machine and the heater cycle. The combination that holds 50°C for a six-hour ABS print is the same combination that needs babysitting for the first run.
Wiring the DIY thermostat
The simplest closed-loop build is a PTC ceramic fan heater plus an STC-1000 or W1209 controller. The controller has a relay, a temperature sensor, and a 12V supply. Wire the heater into the relay output, the sensor into the chamber air, and the 12V supply into a wall adapter. Set the target to 45°C for ABS, 55°C for nylon, or 60°C for PC.
The W1209 is the cheaper controller and works fine for most tents. The STC-1000 has a wider temperature range and a clearer display. Either is fine for ABS work; pick by what is in your bench drawer.
For Klipper-based printers like Voron and Snapmaker, configure a [heater_generic chamber_heater] block with an ATC Semitec 104GT-2 sensor and PID tuning. The Klipper control loop handles the heater cycles and the safety cutoff.
How long to preheat
Plan 10 to 20 minutes of chamber preheat before the print starts. A 400W PTC heater on a small tent reaches 50°C in roughly 15 minutes. A DIY 200W setup with a thermostat takes 20 to 30 minutes. Add the preheat to your total print time so you are not surprised by the clock.
Once the chamber settles, the heater cycles on and off to maintain target. That cycle is normal and quiet. If the cycle is fast and loud, the heater is undersized or the tent is leaking air; either fix is more useful than ignoring the noise.
Bottom line
The Creality 400W PTC Chamber Heater is the best 3D printer enclosure heater for most ABS and ASA setups, with dual fans, an external controller, and dual safety shutoffs in one box. For a tighter DIY budget, pair the PTCYIDU 110V 200W PTC fan heater with an STC-1000 thermostat and a 12V circulation fan. Either way, match the heater to the tent, add a vent kit and a carbon filter for ABS fumes, and respect the safety gear that goes with a heated fabric box.
Frequently Asked Questions
Can I keep my 3D printer in a cold room?
Yes, but cold air is the reason ABS, ASA, and nylon parts warp at the corners and split between layers. A cold room pulls heat out of the print faster than the heated bed can rebuild it. An enclosure plus a chamber heater is the standard fix; the tent blocks drafts and the heater holds the chamber at the temperature the filament wants.
Do I need a heated enclosure for ABS?
For consistent ABS prints, yes. A fabric tent alone cuts drafts but does not raise chamber temperature above what the bed gives off. A 45 to 50°C chamber holds corners flat on most ABS prints and reduces layer separation. For larger ABS parts or nylon, target 55 to 60°C and a thermometer in the chamber.
How hot does a 3D printer enclosure get?
With a heated bed and a 400W PTC heater running, a small fabric tent hits 50°C in roughly 15 minutes. With a passive tent alone, the chamber usually settles around 35 to 45°C on a cold day. The temperature is also a function of the tent size, the heater wattage, and how often the door is open.
Which 3D printers have a heated enclosure built in?
Bambu Lab X1, X1C, P1S, and Qidi Q1 printers have factory chamber heaters. Most Creality, Voron, and Prusa open-frame printers do not. For Voron, you add a chamber thermistor and a Klipper heater_generic with PID tuning. For Creality and Ender-class printers, an aftermarket PTC kit is the cleanest install.
Can I make a DIY 3D printer chamber heater myself?
Yes. The most popular DIY build is a 100 to 200W PTC ceramic heater with a 12V or 24V circulation fan, controlled by an STC-1000 thermostat. PTC elements self-regulate, so they are inherently safer than resistive wire. Add a thermal fuse bonded to the heater core for the failure case.
Are heated enclosures safe?
Yes, with the right wiring and a smoke detector nearby. PTC ceramic heaters are self-regulating and surface-insulated, which removes the runaway-heater failure mode. Pair the heater with a thermostat that cycles power, run the wiring through GFCI-protected outlets, and keep a smoke detector in the room. Do not leave a first print unattended overnight until you know the machine.
What is the difference between a PTC heater and a space heater?
A PTC heater is a positive temperature coefficient ceramic element that drops its power output as it heats up, so it self-regulates. A space heater is a resistive element that keeps drawing full power unless a thermostat cuts it. PTC is the safer pick for a small enclosure because runaway heating is built into the element.
Do I need a vent kit with a chamber heater?
Yes. A sealed enclosure concentrates ABS and ASA fumes, which are heavier than air and linger at bench height. Pair the heater with a vent fan and a carbon filter. Our best 3D printer enclosure fan guide covers the kit options.
What size heater do I need for a fabric tent?
Most home ABS benches on an Ender or Neptune frame heat up with a 200 to 400W PTC element in 10 to 15 minutes. Larger CoreXY enclosures with a heated chamber want more wattage or a second circulation fan. Match the heater to the tent footprint; an oversized heater on a small tent cycles on and off without settling.
How long does it take to heat a 3D printer enclosure?
Plan 10 to 20 minutes of preheat before the print starts. A 400W PTC heater on a small tent hits 50°C in roughly 15 minutes; a DIY 200W setup with a thermostat takes 20 to 30 minutes. Add the preheat to the total print time so you are not surprised by the clock.